Nordic Ware Basic 9-Piece Simply Sourdough Bread Making Kit

In stock
SKU
42150
Shop Collection:
Nordic Ware Simply Sourdough Kits
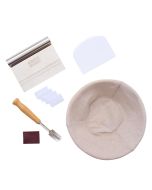
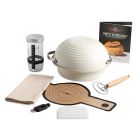
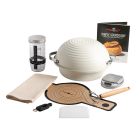
9-Piece Complete Kit

Ready to master the art of sourdough? Whether you're a first-time baker or looking to sharpen your skills, the Basic Simply Sourdough Kit gives you all the tools to craft homemade loaves with ease and confidence. this all-in-one set simplifies the sourdough process from starter to slice. This all-in-one set simplifies the sourdough process—from starter to slice. Why Make Sourdough? Crafted with just four ingredients—flour, water, salt, and a starter—sourdough is a return to simplicity and wholesome tradition. It has simple, whole ingredients, unique flavor, gentler on your stomach, and offers endless room to grow and experiment with many different recipes. Simply Sourdough is the smarter way to start your sourdough journey. No cast iron required—just pure, baking joy from your own oven. Get everything you need to start your sourdough journey with the Simply Sourdough Kit. To learn more about the benefits and features of the Simply Sourdough Kit click here.
Nordic Ware Basic 9-Piece Simply Sourdough Bread Making Kit Features:
- Set Includes:
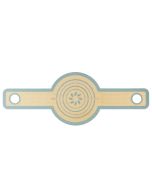
- Glass Starter Jar with Temp Strip & Tracker Band
- Danish Dough Whisk
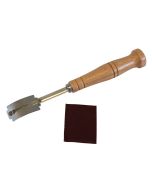
- Retractable Bread Lame
- Plastic Bench Scraper
- Silicone Lifting Sling
- Cotton Proofing Towel (20" x 20")
- Quick Start Guide + Recipes
- Glass Starter Jar with Temp Strip & Tracker Band: Easily monitor your starter’s rise and readiness with clear visibility and guided tracking
- Danish Dough Whisk: Mix thick doughs effortlessly with this specially designed whisk—ideal for everything from bread to cookie batter
- Retractable Bread Lame: Score your dough safely and precisely for that professional finish. Blade retracts for safe storage
- Plastic Bench Scraper: Shape, divide, and transfer dough with ease using this flexible, bowl-hugging tool.
- Silicone Lifting Sling: Replaces parchment paper! Easily lift dough in and out of the pan with this reusable, oven-safe mat
- Cotton Proofing Towel (20" x 20"): 100% unbleached cotton liner for proofing bowls or covering resting dough
- Quick Start Guide + Recipes: The quick-start guide provides all the information you need to begin your sourdough journey. Includes step-by-step instructions and proven recipes to kickstart your sourdough success
- Made without PFAS
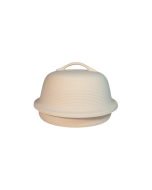
- Proofing & Baking Lid + Baking Pan Base Use & Care:
- Before initial use and after subsequent uses, hand wash pan and lid with warm, soapy water
- Dishwasher use is not recommended, as it may shorten the life of the nonstick coating
- Metal utensils, scouring pads and abrasive cleaners should not be used on nonstick surfaces. Nylon or silicone utensils are recommended
- Preheating pan before baking is not necessary. When ready to bake, place pan with prepared dough into preheated oven. See our quick start guide included in kit for more information
- Glass Starter Jar Use & Care:
- Temperature Sensitive Adhesive Strip Thermometer and Adjustable Feeding Tracker come with the jar. If using the adhesive thermometer, peel off backing of the thermometer strip and stick to the exterior of glass jar opposite the printed graphics
- Place Adjustable Feeding Tracker band around the jar to track the starter’s last feeding cycle and initial feed height
- If not using the adhesive thermometer, jar can be washed in the dishwasher. Before washing, be sure to scrape the remaining starter into another ‘discard’ jar for later use or put in trash. Do not rinse down the sink
- Danish Whisk Use & Care:
- Before initial use and after subsequent uses, hand wash with warm, soapy water
- Do not soak or wash in dishwasher as wood can crack and warp
- Cloth Proofing Liner Use & Care:
- Wash and dry in normal laundry
- Bench Scraper Use & Care:
- Dishwasher safe. Not oven Safe
- Silicone Lifting Sling Use & Care:
- Dishwasher safe
- Oven-safe to 500°F
- Retractable Lame Use & Care:
- Lame and double-edge blades are packaged separately in kit and need to be assembled before use
- CAUTION: Blades are sharp. Please handle with care. Follow instructions on lame packaging for how to assemble and replace the blade, listed below:
- Carefully separate the lame
- Remove the sliding blade slot
- Carefully place the blade securely into the notch of the thumb slider
- Reattach the slide blade slot to the notch of the thumb slider
- Reassemble the lame, ensuring the blade fits securely
- Carefully test blade to ensure it activates properly
- Carefully hand-wash lame with warm, soapy water
- Made in USA
- 5 Year Manufacturer's Warranty
| Manufacturer Part Number | 42150 |
|---|---|
| GTIIN / UPC Code | 00011172421500 |
| Product Name | Nordic Ware Basic 9-Piece Simply Sourdough Bread Making Kit |
| Description Author | Everything Kitchens |
| Home or Commercial | Home |
| Capacity | N/A |
| Quantity Included | 9 pc |
| Product Type | Bread Making Tools |
| Brands | Nordic Ware |
| Product Line | N/A |
| Manufacturer's Warranty | 5 Year Limited Manufacturer Warranty |
| Country of Manufacture | United States |
| Weight (in Lbs) | 5.000000 |